We have installed SSDs on two Desktop PCs, Lenovo ThinkCentre and Dell OptiPlex Mini Tower. And another one on Dell Vostro Notebook Computer. If your computer has the similar specification, this will be a good fit for you to read on.
The steps outlined here apply only for Windows PC. For those who have Apple Macbooks and want to install SSD on it, we will cover it in the next topic for you. Or you may view this Installing SSD on MacBook Pro guide on YouTube we found recently.
Every manufacturer has their own system operating manual. You can always refer to their website for detailed information.
Below are the simple ways you can use to install your SSD:
Table of Content
Steps To Install SSD In Desktop PC
1. Check Motherboard Compatibility
2. Shut down PC for safety
3. Remove side panel to install SSD
3.1 To Install 2.5” SATA SSD
3.2 To Install M.2 SSD
4. Reassemble casing and power up SSD
Steps To Install SSD In Laptop Computer
1. Check type of SSD your Laptop can accept
2. Shut down computer and remove battery before installation
3. Remove Bottom Panel
4. Remove HDD to replace with SSD
5. Reassemble back the bottom panel
6. Setup the SSD
Always check your computer system manual before installing your SSD. If you do not have one, do a search on the internet. Make sure your computer is suitable to install the SSD.
You may start reading our article below to get an idea on How To Install Your SSD in your computer.
Steps To Install SSD In Desktop PC
1. Check Motherboard Compatibility
Depending on the age of your PC, the motherboard may not support the SSD you bought. Check the manufacturer system manual or search online for information on the compatibility.
By looking at the interface of your HDD, you can determine the type of SSD you should purchase. Most of the HDDs interface is SATA interface, you will not go wrong to choose a 2.5” SATA SSD.
Only when you find a M.2 slot on the motherboard, you can install a M.2 SSD on it. Otherwise, omit this option.
You may use Crucial Advisor Tool to check which type of SSD is suitable for your motherboard. Or download System Scanner Tool on your PC to scan for suitable SSD for your system.
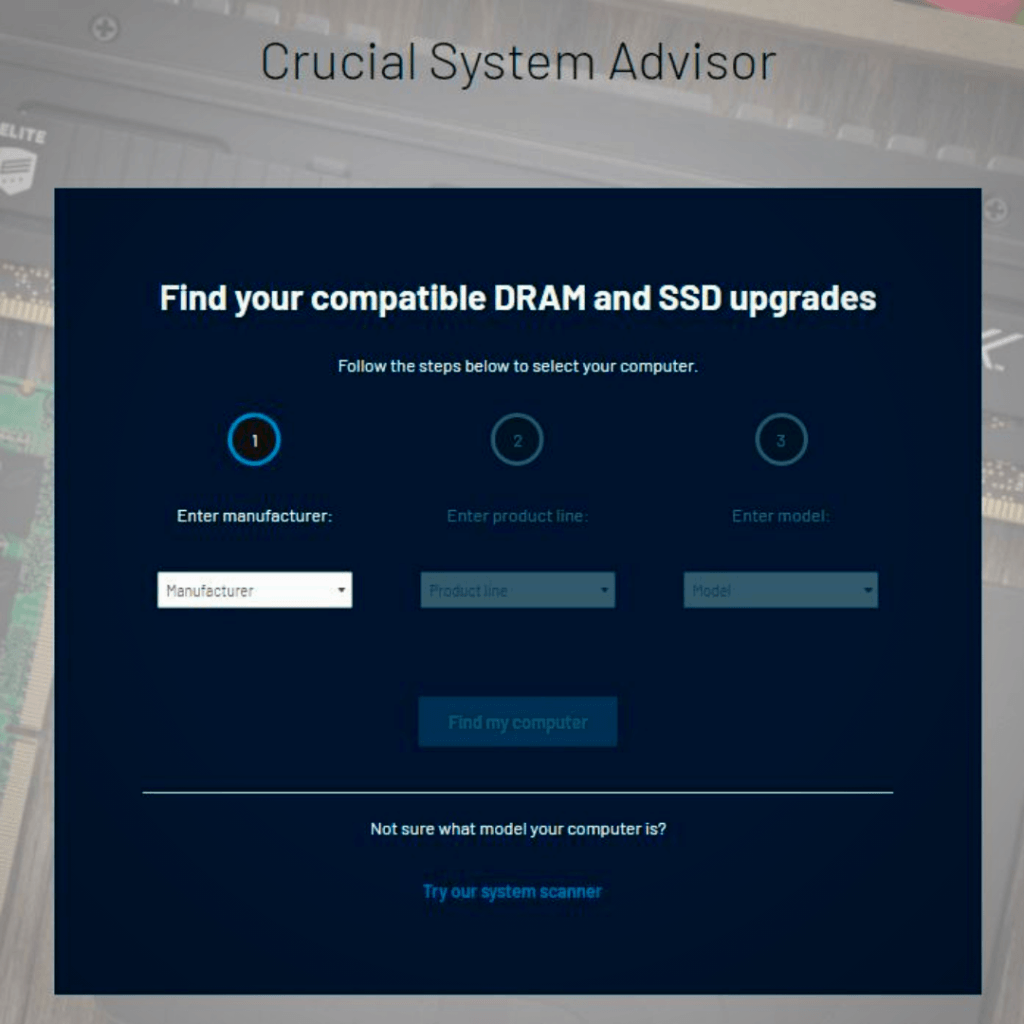
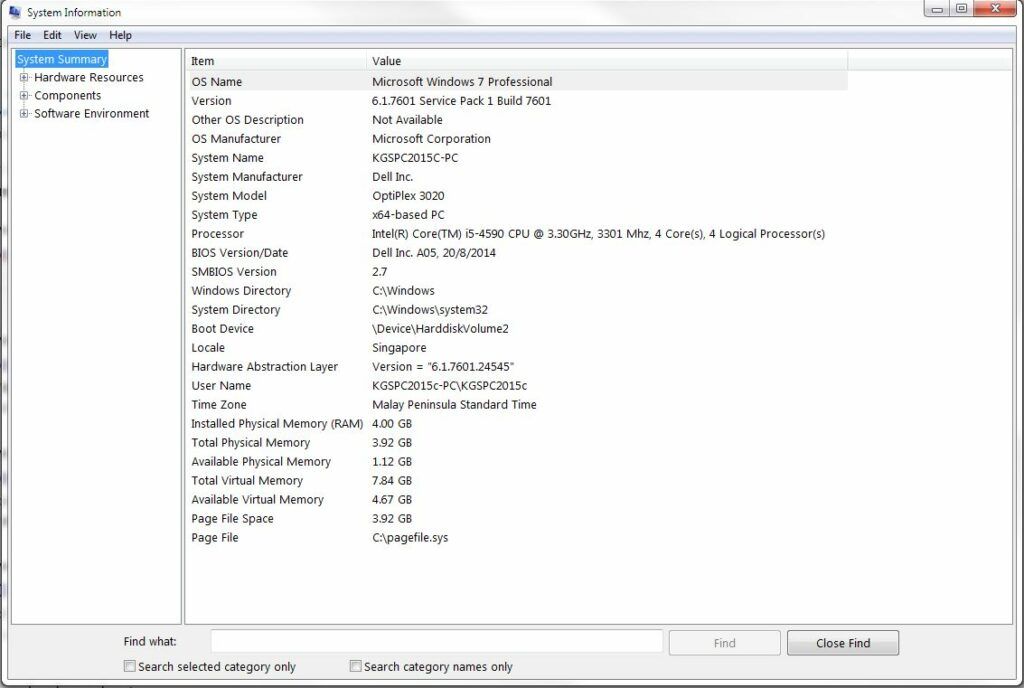
Or use Command Prompt and access Windows System Information. Your PC will give you all kinds of information about your PC’s hardware and software environment.
Below is the screenshot we took when we type in “msinfo32” following the command prompt. The System Manufacturer and model number will help you to check online, which SSD is suitable for you.
2. Shut down PC for safety
Power off the computer and remove the power cable to prevent anyone from turning on the PC again. This is a safety precaution to whoever deals with a computer.
Wear an ESD wrist strap to discharge any static electricity from damaging the computer.
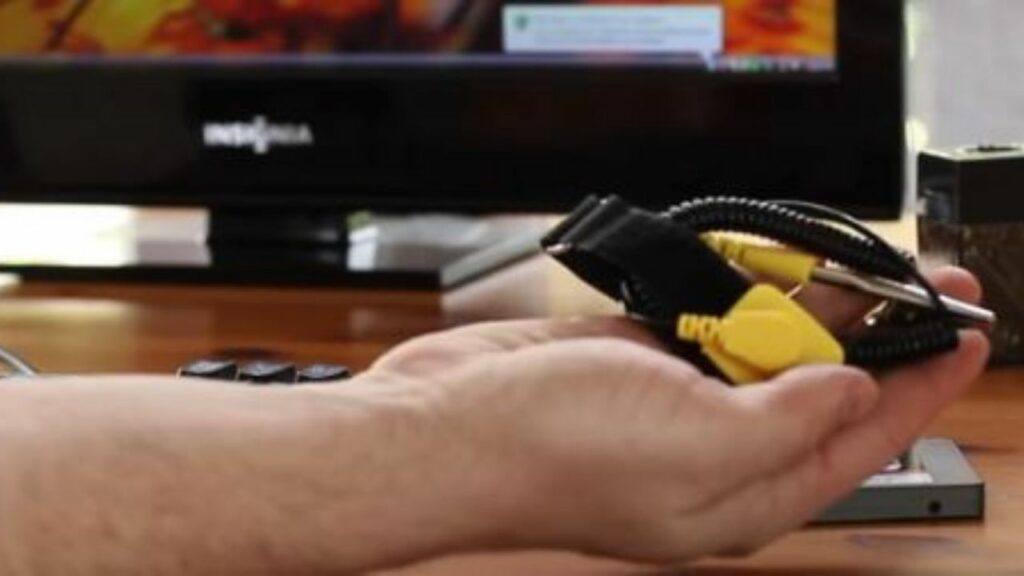
wearing ESD wrist strap before installing SSD
3. Remove side panel to install SSD
There are various types of SSD and you will choose the right one matching with the motherboard. Here, we show you how to install 2 common types of SSD: 2.5” SATA SSD and M.2 SSD.
3.1 To Install 2.5” SATA SSD
Remove the panel at the side and locate an empty storage bay to put in the SSD. Mount the SSD inside the mounting bracket.
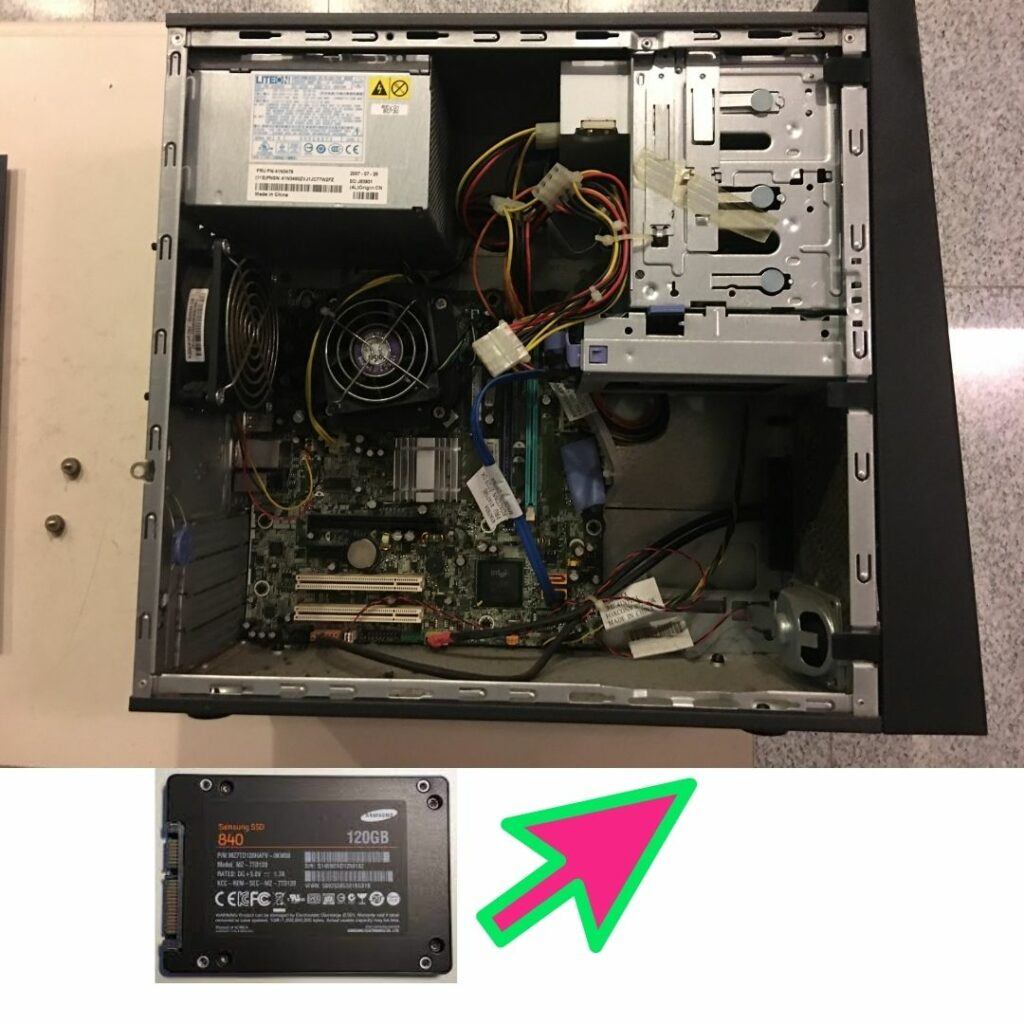
Connect the power cable from the power supply to the SSD power connector, and the SATA data cable from the motherboard to the SSD data connector.
Do not touch any connector on the SSD and also open the SSD. This is to avoid any warranty void by the manufacturer.
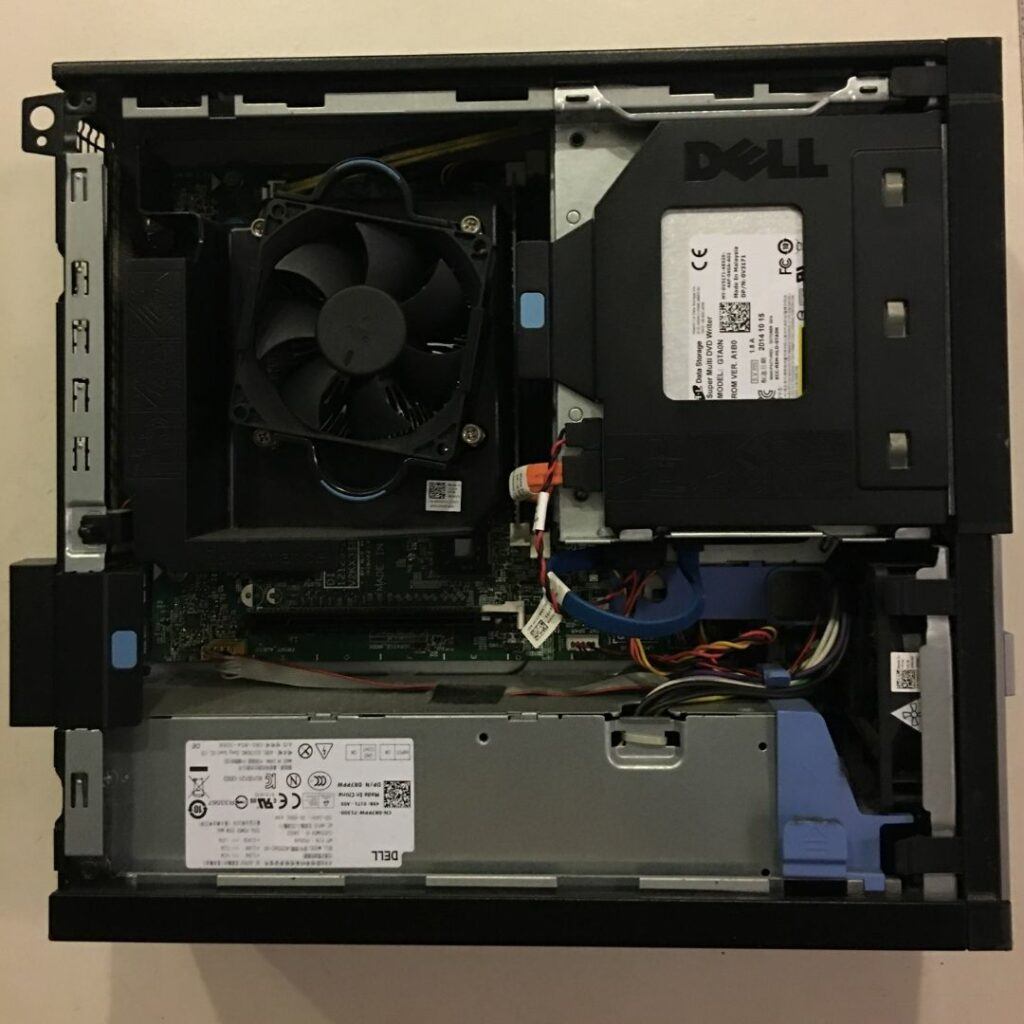
Below is the photo of our Dell OptiPlex Desktop, showing where to install a 2.5” SATA SSD inside the computer.
3.2 To Install M.2 SSD
For newer motherboard versions, likely there is a slot for the M.2 SSD to put in. Identify the location and slot in your M.2 SSD.
There are 3 versions of M.2 interface: B key (socket 2), M key (socket 3) and B&M key. B key supports SATA interface while M key supports NVMe interface. B&M key can support both types of interfaces.
With this in mind, choose the appropriate SSD to match this interface during purchase.
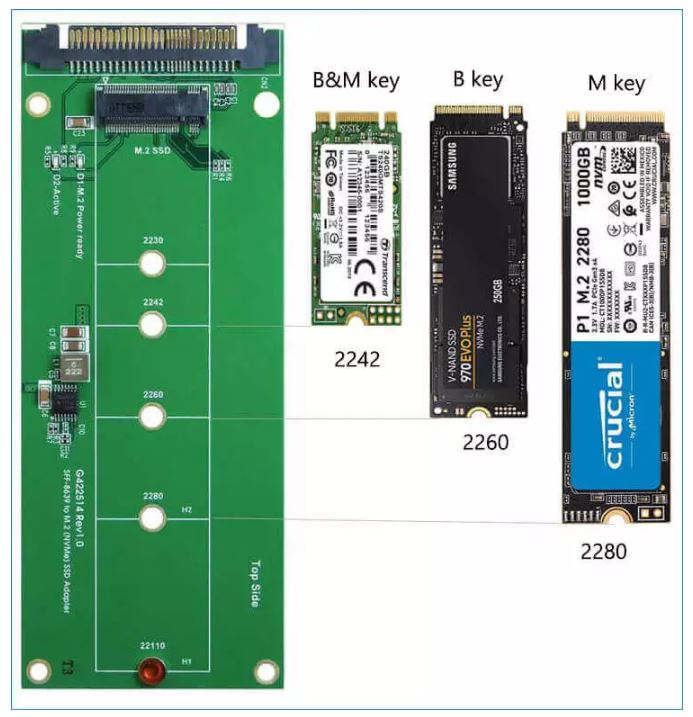
Source: from www.shareus.com
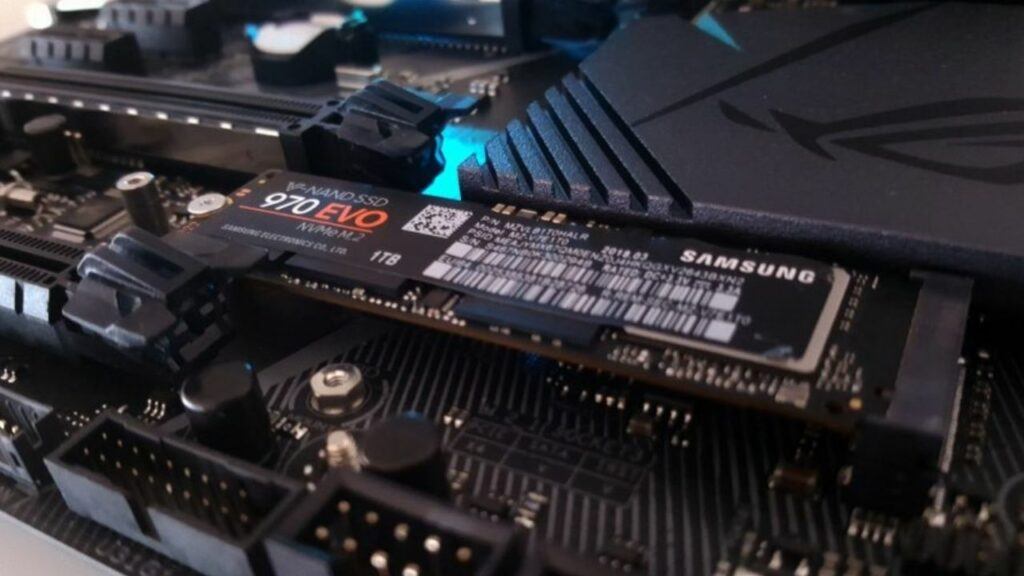
Plug the M.2 SSD into the slot on the motherboard. Make sure the key on your M.2 card can fit into the slot.
Make sure you tighten the M.2 SSD inside the slot. You may need to use the screw that comes with the motherboard or SSD to secure it within the slot.
4. Reassemble casing and power up SSD
Make sure the SSD sits within the mounting bracket. Close up the side panel and tighten the screw back.
If you wish to install a new Windows OS on the SSD, remove all the cables connected to the HDD before you reassemble back the panel.
Remove the HDD if do not intend to use it for data storage, remember to connect back all cables after SSD become the main drive to start the OS.
Insert a USB thumb drive with the latest Windows 10 on it and switch on your computer. Follow the onscreen instruction and keyin all the relevant information into the system.
Your computer should now run faster with the new SSD in place.
Steps To Install SSD In Laptop Computer
1. Check type of SSD your Laptop can accept
Removing the casing of your Laptop can be a challenge. Thus, check whether it can accept SSD and which type can install on it.
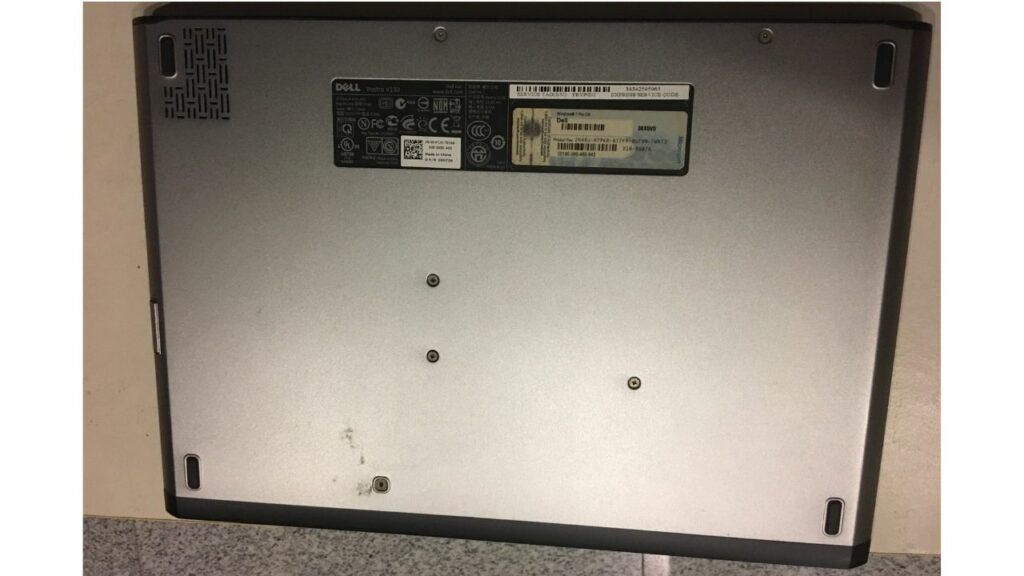
You can check Online based on the model of your Laptop or visit this page at Crucial website to see what type of SSD is acceptable. Your computer user manual is also a useful reference to check the details.
2. Shut down computer and remove battery before installation
For safety precaution, remove all the power cable and take out the battery pack from your Laptop.
Depending on the brand and model of your Laptop, the battery pack could be removable or fix inside the computer. Read the operating manual and follow the instructions to remove all the necessary components.
Put on an ESD wrist strap to prevent static from building up and damage your Laptop.
3. Remove Bottom Panel
Due to the compactness of a Laptop computer, everything is compact within the casing in Laptop. You will need to remove the bottom panel to access the internal component of your Laptop PC.
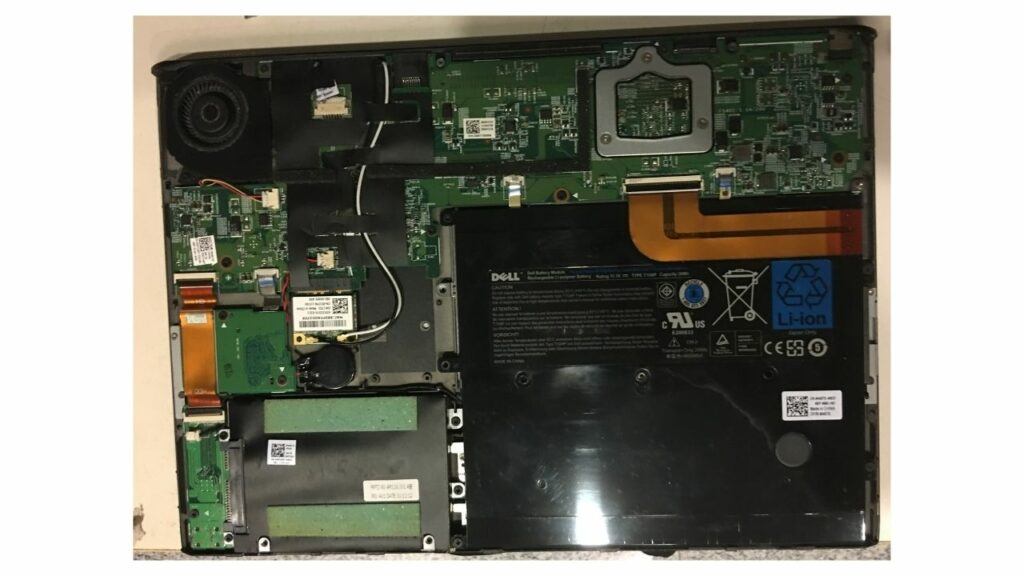
Check whether your Laptop accepts 2.5” SATA SSD or M.2 SSD.
4. Remove HDD to replace with SSD
The space within a Laptop is small and compact. Thus, only one HDD or SSD can install inside a Laptop.
Before removing the HDD, transfer all its content to another external storage. You can use cloning software to speed up the process.
Install the suitable SSD inside your Laptop.
5. Reassemble back the bottom panel
Before powering up your computer, fix back the bottom cover of your Laptop. This is important for safety precautions.
Ensure no obstruction when putting back the bottom cover. All the internal wiring/cable need to connect to the right location/connectors.
6. Setup the SSD
Follow the onscreen instruction to set up the SSD at your Laptop. Insert the USB drive with the latest Windows software to startup your computer.
Ensure your computer can boost up the Windows OS when turning on the computer.
What To Do Next?
With your SSD installed on your computer, you may want to check the health of this SSD.
We have an article showing you How To Check The Health Of Your SSD. Go over and have a read and you will learn more about SSD technology.


This is an excellent walk through of how to install SSD.
These sort of things would normally scare me and I wouldn’t even consider doing it in case I made a mess.
However, your step by step instructions have given me the confidence to do it. The photographs are really helpful, as I can see exactly what you mean.
Thanks for sharing.
Hi Geoff,
Glad that you found our step-by-step guide useful. Feel free to read more of our electronics products guide often.
We have spend quite a decent amount of times created those contents, in particular Solid State Drives topics. As NAND Flash memory prices continue to fall and with more advanced technology, we will see more and more newer computers installing SSD inside.
As compared with HDD, SSD give us faster boot times and lighter in weight. We look forward to see more breakthrough in Solid State technology.
NVMe SSD is getting popular recently and we are expecting more manufacturers launching newer version in the market. We will provide more content on this technology to our readers in the coming months.
Thank you for your comment.